
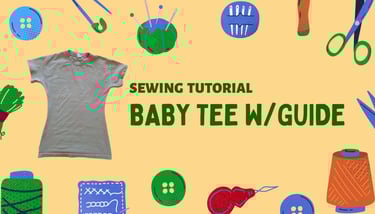
Baby Tee Tutorial
Step by Step tutorial on a how to sew a baby or fitted T-shirt with a guide
SEWING
7/27/20255 min read

Hey Misfits, what's da deal. Today this is your guide to sewing a fitted (baby) tee. Baby is in parentheses because I feel like its considered baby when you crop it. But anywho...
This guide will go through the 1. Material + Tools, and then 2. 10 Steps and some tips to sewing your tee.
I won't bore you with useless verbosity, so lets get into it!
So you want to sew a fitted baby tee...
Materials + Tools
OK. Well starting with material. Any thrifted T-Shirt or any shirt in your closet that you want to make fit nicer. I suggest and prefer to use 100% Cotton Tees if you can, I'm a sweaty gal, so cotton is usually the material I seek out but you can use stretchy material just ensure you give yourself enough seam allowance and use a ball point (stretch needle) if you do so.
Ok tools:
Sewing Machine
Universal Needle
Matching Thread
Fabric Scissors
Ruler
Sewing Gauge (the small metal ruler)
Pins (or clips)
Iron
Chalk


Steps
10 Detailed steps (including some tips and tricks) on making your tee

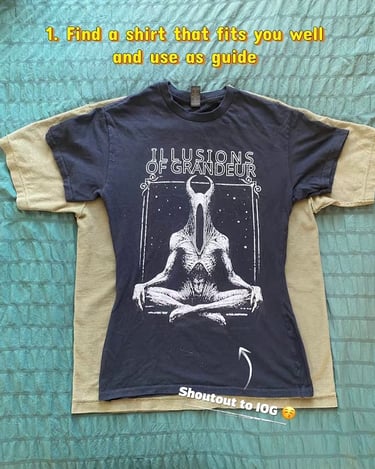
#1 - Use a Guide
Use a well fitted shirt as your guide and trace along the edge. I'm using my Illusions of Grandeur Shirt, which I love so very much. If you're curvy and want a longer fitted tee, make sure the shirt outlines that. Don't just make a square!
*Ensure neckline and seams are aligned at the top of the shirt!
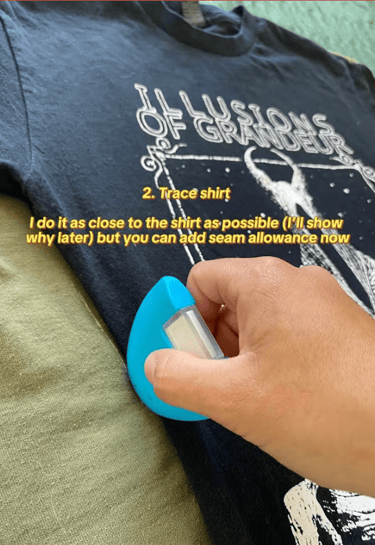

#2 - Trace
Trace along the shirt, make sure you get it as close as possible to the guide. At this point you can add your seam allowance as well.

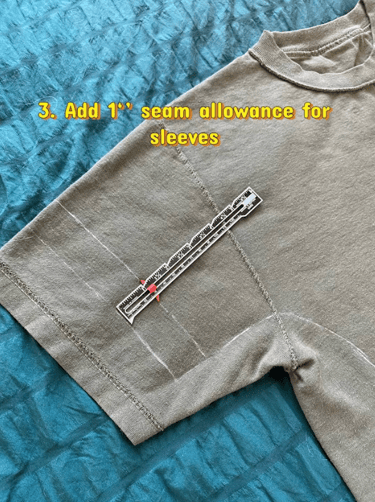
#3 - Sleeves: Sa
Add Seam allowance (Sa) for sleeves, I add about 1" on both sides. So when hemming it looks nice and crisp when you fold over.
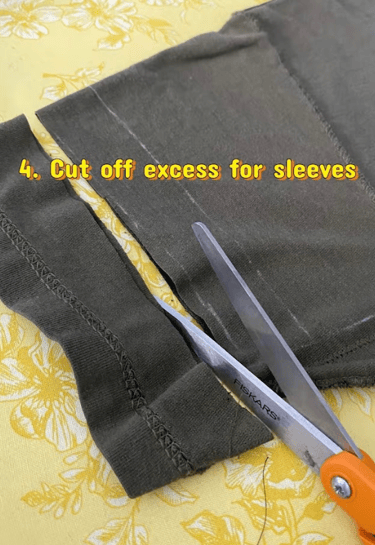
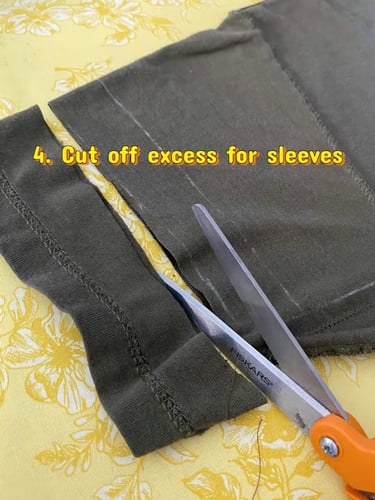
#4 - Cut
Cut off excess for the sleeves. This may seem really simple, but when you're sewing you don't want excess material getting sewn for no reason especially when you can use it for other projects or as scraps.
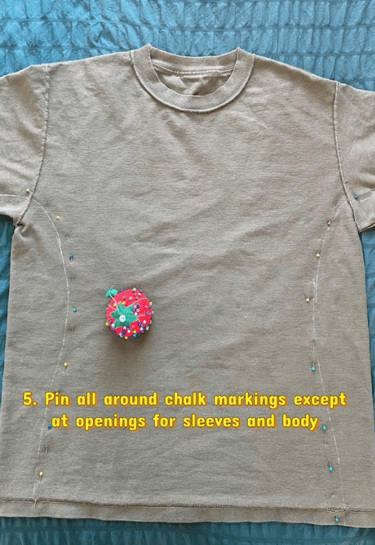
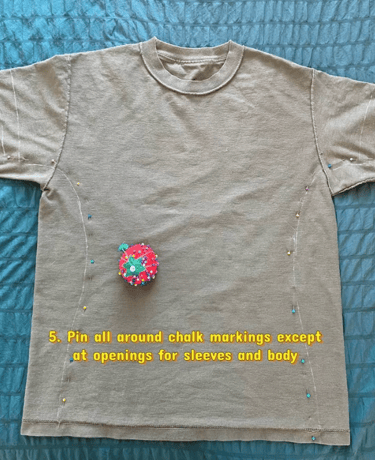
#5 - Pin
Pin along the outline you created. I like to pin on the inside because in a following tip, it makes it easier to sew with seam allowance.
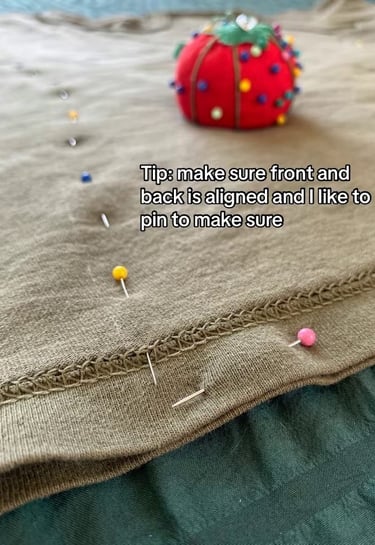
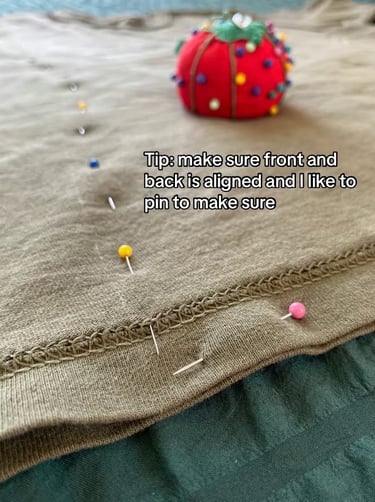
*Tip - Align
Pin the bottom hem together so that the front and back are aligned. You can do this with the sleeves, neckline etc. This ensures your T-Shirt comes out perfect and not all wonky!
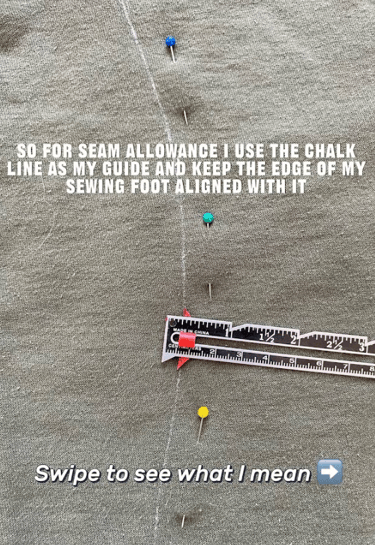
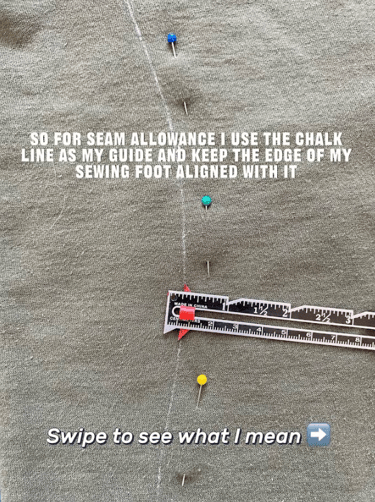
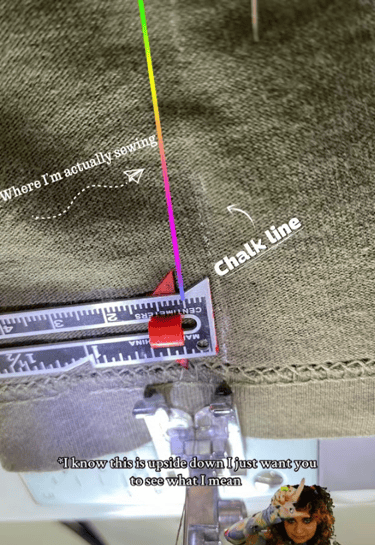

*Tip - Chalk
For this tip, essentially make sure you have your outline marked out where you can see, if you were following along it should be as close to the guideline as possible.
I place the edge of my presser foot along the chalk line and there I begin to sew. This ensures that I am getting a snug fit, and I allow for enough seam allowance for a fitted tee. This is a 1/2" sa.
And this is optional: but overlocking the edges for a cleaner finish
*Tip - cont.
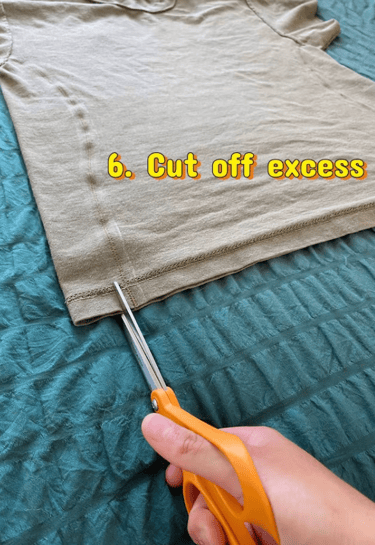
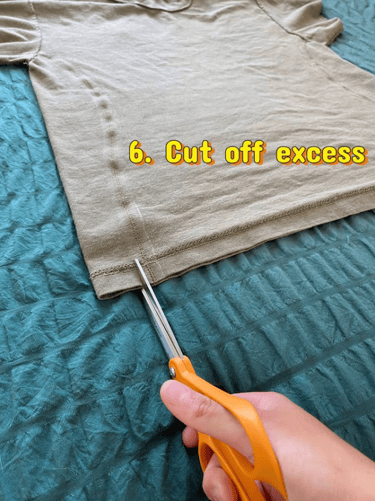
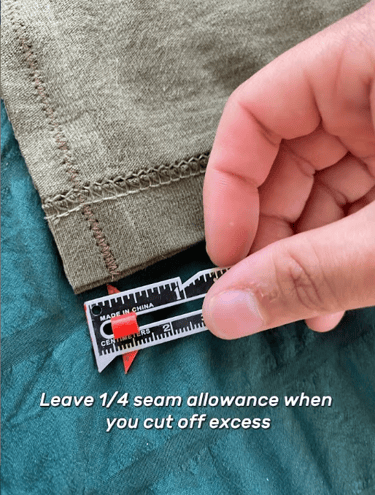
#6 - Cut Excess
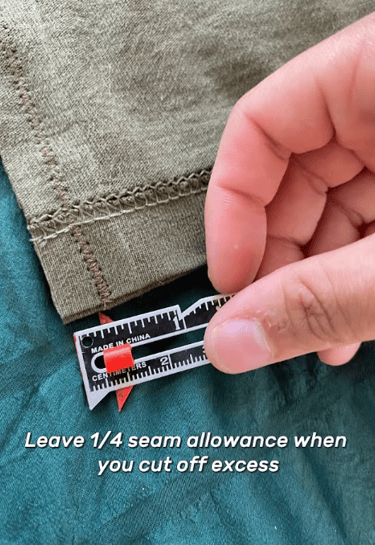
*Tip - Sa
For this tip, essentially make sure you have your outline marked out where you can see, if you were following along it should be as close to the guideline as possible.
Leave a 1/4" Seam allowance when you cut off the excess. If you cut too close to the stitching, over time, it will unravel the work you've done.
You can choose to overlock this edge too to lock it in place.
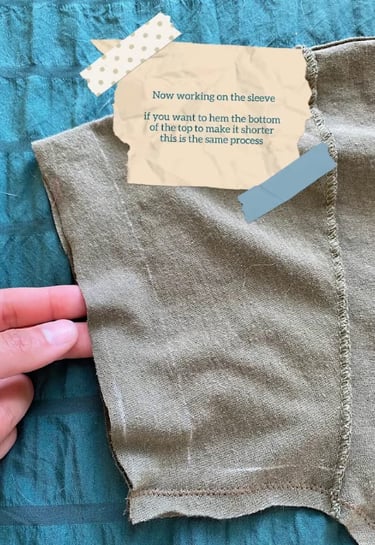
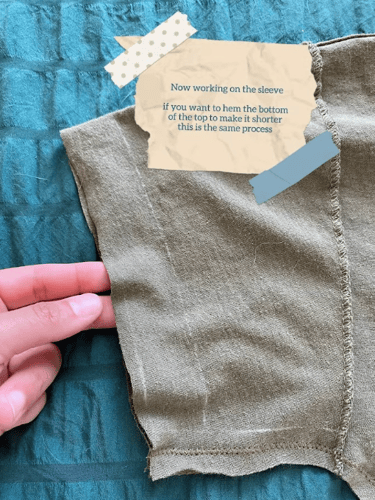


Hemming
Now moving on to the sleeves.
The following steps can also be applied to hemming the bottom of the top if you plan on cropping it.
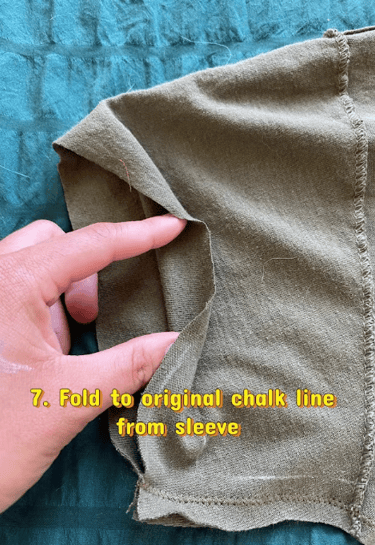
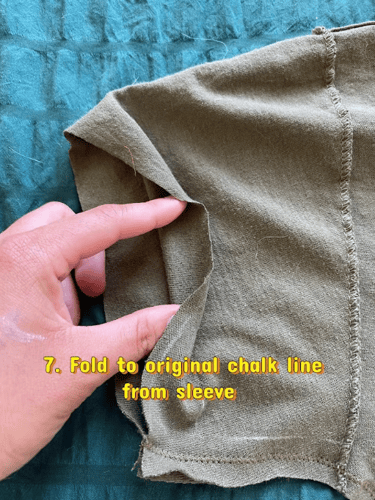
#7 - Fold to line
Now we will fold the sleeve to that original chalk line.
(Remember we added that extra inch sa in a previous step, that is the edge of the shirt sleeve now)
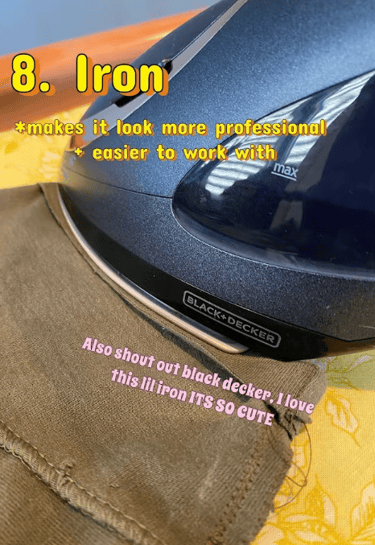
#8 - Iron
For the love of God. Please Iron. Your project will look immensely better ,regardless of talent, if you iron! This is a simple step that takes your project from a 5 to a 9 at least.
Also I recommend this Black Decker Iron I use. It also steams 😛
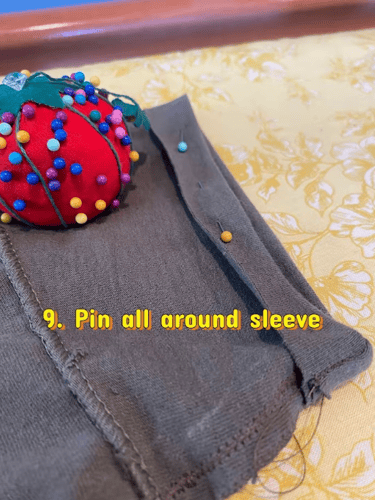
Pin around the sleeve. Make sure you keep the seams aligned so that it looks more professional.
#9 - Pin
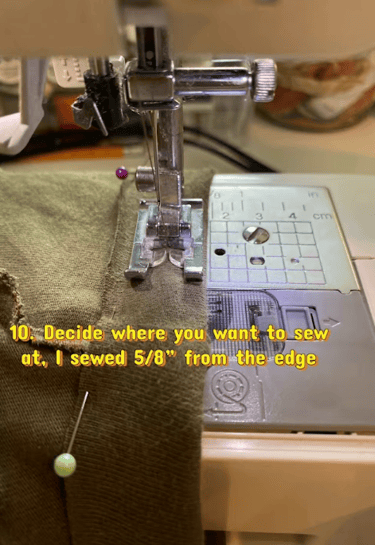
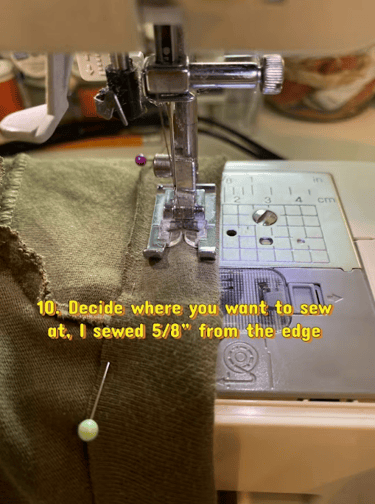
So wherever you sew will be visible on the sleeve so determine a good point to sew at.
As a tip, I typically follow wherever the line were sewn previously on he shirt, just to keep continuity.
Optional - sew another line right below this one
#10 - Sew
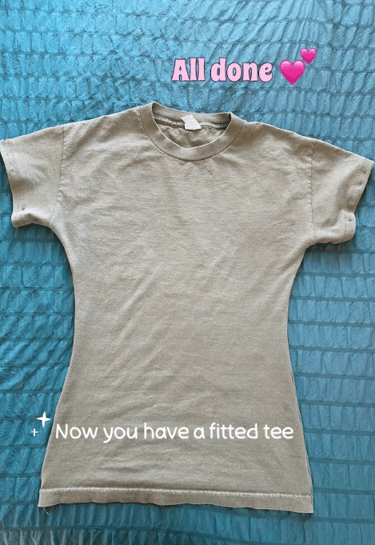
Voila!
If you followed the steps properly, you should, hopefully, have a half decent fitted tee.
Do NOT let up. The first shirt I sewed took me 1hr 30 mins, and now I can do it in under 30! Remember the more you practice, the easier it will get.